Why Rotational Molding Mold Design Is the Foundation of Product Quality
In rotational molding, you decide product quality long before the first production cycle starts. Because of this, mold design has a huge impact on how well a product performs, how consistent it is, and how long it lasts. As a result, two products that look similar on the outside can behave very differently in real use.
Often, problems like uneven wall thickness, deformation, rough surfaces, or short product life come from poor mold design, not the material.
This difference becomes even clearer when you compare rotational molding with other plastic molding methods. Unlike processes that use pressure, rotational molding relies on gravity and rotation. That means mold design and manufacturing give the product its strength, consistency, and durability over time.
Therefore, clients who source rotationally molded furniture, lighting, or custom hollow products should learn how designers create and build molds. Understanding this helps them reduce risks, maintain quality, and produce large quantities reliably.
What Is a Rotational Molding Mold?
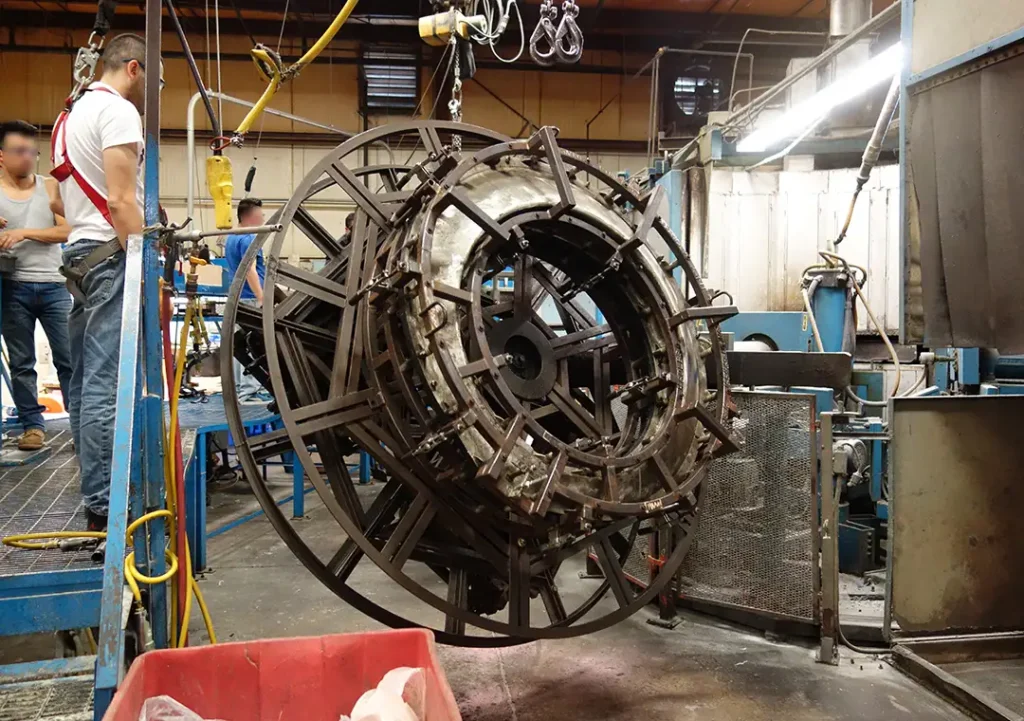
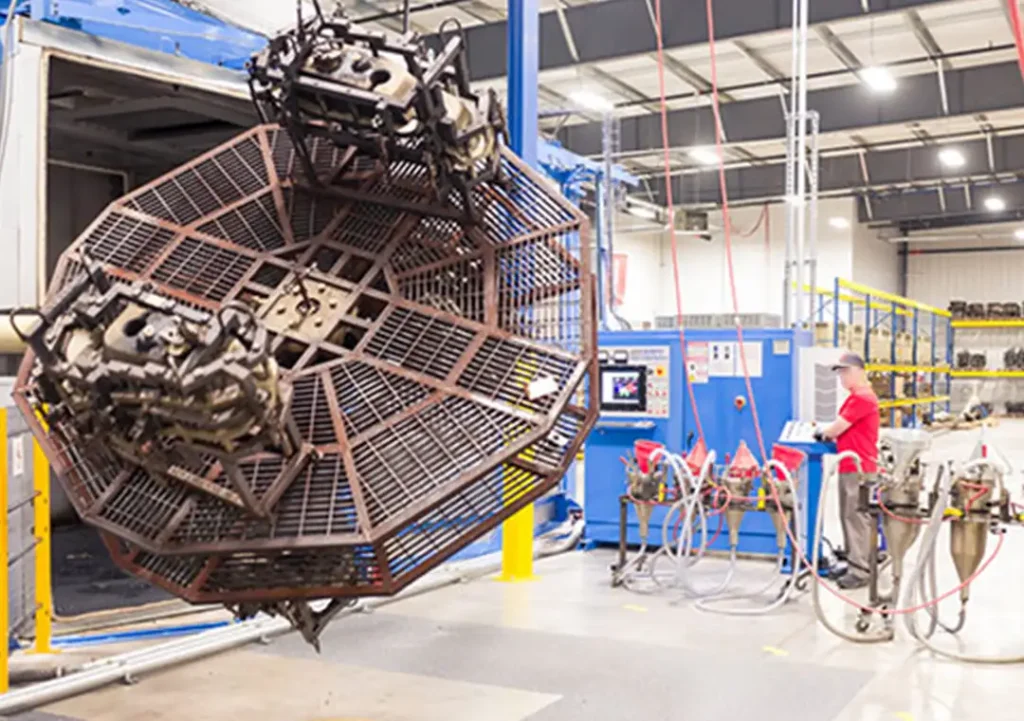
A rotational molding mold is a hollow metal mold—typically aluminum or steel—that rotates inside a heated oven. Plastic powder melts and coats the interior surface evenly, forming a seamless hollow product. For a broader explanation of different molding techniques, see the Wikipedia entry on molding process overview
Compared with injection or thermoforming molds, rotational molds have several advantages:
They work without high pressure
They create thicker, more even walls
They allow complex hollow shapes
They depend on careful geometry rather than force
Because rotational molding doesn’t use pressure to shape the material, the mold itself must guide the plastic naturally. This means designers must plan the mold carefully to make sure the material flows and coats the interior evenly.
Step-by-Step Rotational Molding Mold Design Process
1.Product Design Feasibility Evaluation
Before designers start creating a rotational molding mold, they first check if the product design works well for rotational molding.
Key things to consider include:
How easily the design can achieve even wall thickness
Proper corner curves and smooth transitions
Avoiding sharp internal angles
Planning structural support, such as ribs or varying thickness
Whether the design suits a hollow construction
At this stage, experienced mold designers often suggest improvements that make the product stronger, use less material, and simplify production. Doing this early helps prevent costly changes after the mold is finished.
2. Mold Structure and Parting Design
Once designers confirm the product works for rotational molding, the next step focuses on planning the mold structure.
Key elements to consider include:
Where to place the mold parting line
How many sections the mold will have
How the mold will open and close
Where to put screws, inserts, or embedded components
Pre-planned areas for lighting, electronics, or hardware
This step is especially important for illuminated furniture or LED products. Designers must plan the screw positions, module attachments, and maintenance access during mold design, because these details cannot be added later.
3: Mold Material Selection
Choosing the right mold material is one of the most important decisions in rotational molding design, especially for products like furniture, lighting, or items where appearance matters.
Common Mold Types for Rotational Molding Furniture
In general, rotational molding furniture molds fall into two main types:
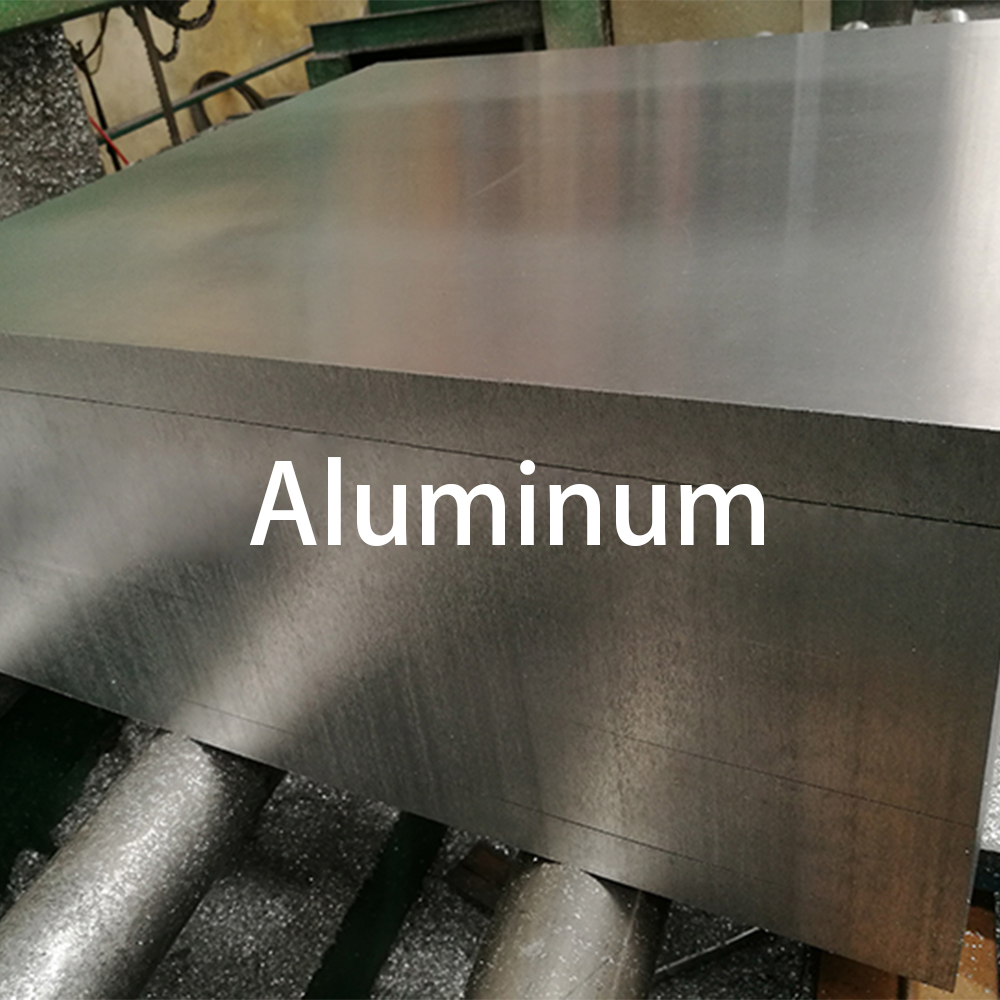
Aluminum molds
Steel molds
Among these, aluminum molds are much more common for furniture and decorative products because they offer better precision, transfer heat more efficiently, and give better control over surface quality.
Why Aluminum Molds Are Preferred
After CNC machining, aluminum molds offer:
High dimensional accuracy
Better control of deformation during heating and cooling
Easier machining of complex details
Excellent suitability for high-precision and high-appearance requirements
This makes aluminum molds ideal for products with strict visual standards, refined curves, and consistent wall thickness requirements.
Two Main Types of Aluminum Molds
1. Forged Aluminum
Designers usually choose forged aluminum molds for premium products that need a high-quality surface finish.
Key characteristics:
Forged aluminum molds offer the following advantages:
High-quality material suitable for painted, sprayed, or high-gloss surfaces
Strict surface standards with no tolerance for sand holes
Fast material availability, usually within 1–2 days
Higher material cost
Faster CNC machining
Lower risk of machining scrap
Excellent polishing performance for high-gloss finishes
CNC machining on both inner and outer surfaces
More uniform mold wall thickness
Because of these benefits, forged aluminum molds are ideal when you need consistent appearance, high precision, and long-term stability.
2. Cast Aluminum (Sand Casting Aluminum)
Designers often choose cast aluminum molds for projects that need to control costs.
Advantages:
Cast aluminum molds usually cost about 30% to 50% less than forged aluminum molds.
Limitations:
Cast aluminum molds have some limitations to keep in mind:
The surface can develop sand holes
Overall mold weight is heavier
Higher chance of mold deformation
CNC machining needs pre-alignment and calibration
Lower machining efficiency
Higher risk of machining scrap
Longer lead time: raw material usually takes about 2 weeks to arrive
If scrap occurs, delivery may be delayed by another 2 weeks
Sand hole defects may repeat even after re-machining
Vertical inner cavities are especially prone to honeycomb-like pores
Requires a detailed risk evaluation with the casting supplier before production
Inner reverse surfaces often aren’t CNC-machined, causing locally uneven wall thickness
Because of these risks, it’s essential to conduct an early technical evaluation during the rotational molding mold design stage to prevent production delays and quality problems.
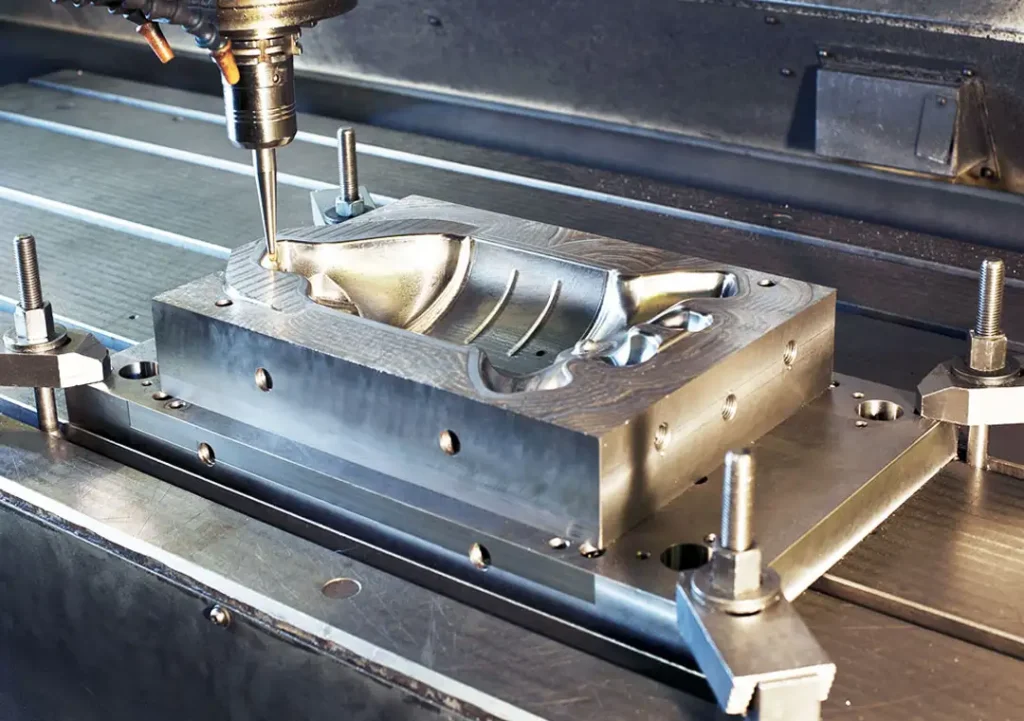
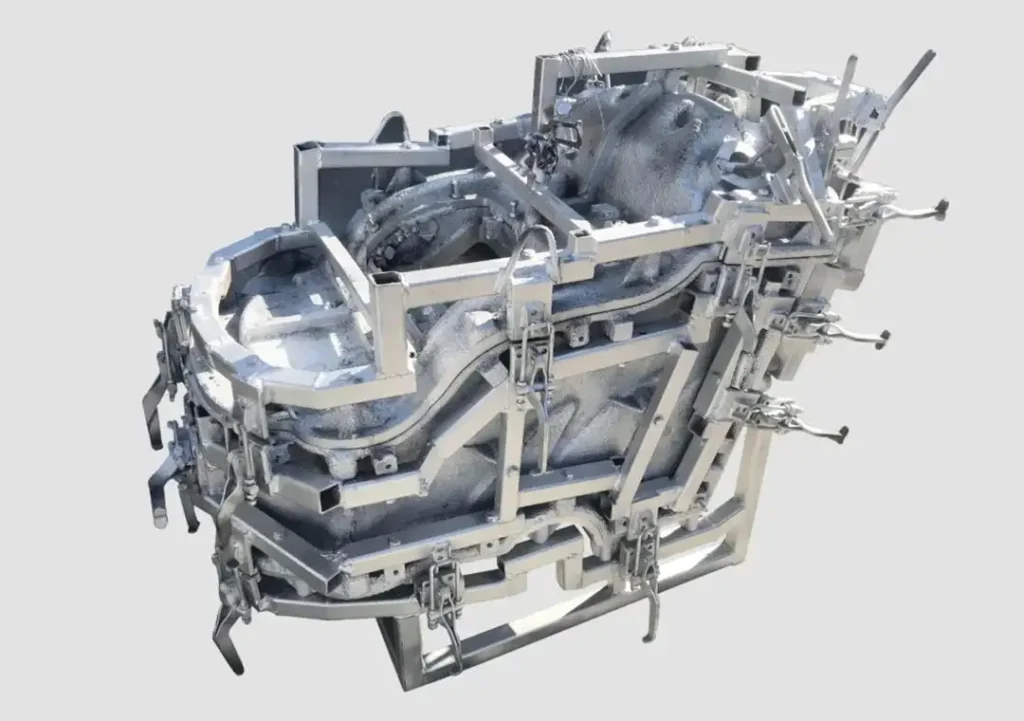
Mold Manufacturing and Precision Machining
After the mold design gets approval, manufacturers start making the mold.
This stage usually involves:
CNC machining of mold components
Controlling precision and tolerances
Surface finishing, such as sandblasting, polishing, or adding textures
Installing vents, inserts, and reinforcement structures
High-quality mold manufacturing helps:
Keep wall thickness consistent
Achieve smooth surfaces inside and out
Maintain reliable mold alignment during rotation
Reduce defects during mass production
Trial Molding and Optimization
No rotational molding mold design is complete without testing.
The trial molding phase usually includes:
Initial test runs
Measuring wall thickness
Optimizing heat and rotation
Finding weak points or areas where material accumulates
After reviewing the test results, designers make fine adjustments to the mold or process settings. This step relies on experience and craftsmanship to make sure the mold performs consistently during real production.
Rotational Mold Manufacturing Workflow
For aluminum-based rotational molding molds, especially CNC-machined ones, the manufacturing workflow usually follows a precise, step-by-step process:
Client provides product drawings or physical samples
Reverse engineering and drawing verification
Preparing design documentation and process guidance
Planning mold parting lines and mold structure
Confirming mold material (including cast aluminum if needed)
CNC machining of mold components
Wire cutting or EDM processing (if required)
Surface treatment, such as sandblasting or polishing
Mold frame assembly and fitting
Trial molding and performance testing
Following this structured workflow helps ensure mold accuracy, stable production, and predictable delivery—especially for furniture and lighting products that need consistent quality across batches.
From client confirmation to full-scale production, a professional rotational molding workflow typically includes these stages:
Product and mold design confirmation
Mold machining and assembly
Trial molding and refinement
Sample approval
Stable mass production
Having a clear and transparent workflow reduces uncertainty and gives clients confidence that timelines, quality, and costs are under control.
What a Well-Designed Rotational Mold Delivers to Clients
Investing in good mold design and manufacturing offers long-term benefits:
More uniform wall thickness
Stronger, more durable products
Better surface quality
Longer mold lifespan
Fewer defects
Lower maintenance and replacement costs
These advantages are especially important for projects that require consistency, such as resorts, events, public installations, or branded environments.
Why Rotational Molding Mold Design Capability Matters When Choosing a Manufacturing Partner
Not all rotational molding suppliers have in-house expertise for mold design and manufacturing.
Working with a partner who has strong mold capabilities can help you:
Spot design risks early
Optimize products for long-term performance
Integrate lighting and functional components smoothly
Handle custom projects efficiently
Maintain stable quality across large production runs
In rotational molding, the mold isn’t just a tool—it forms the foundation of the product. Choosing a manufacturer with proven mold design and production experience is the best way to ensure reliable results from concept to completion.
Our Approach to Rotational Molding Mold Design for Custom Projects
For custom furniture and illuminated products, rotational molding mold design is never just a standalone tooling task. It is an integral part of product engineering, appearance control, and long-term production planning.
By using CNC-machined aluminum molds, we can:
Control mold deformation during heating cycles
Achieve consistent wall thickness across complex shapes
Ready for Signature Glow Furniture?
Continue our technical series:
Rotational Molding Materials →
Rotational Molding Post-Processing →
Rotational Molding Applications →